Within ServeSpark, managing user roles and permissions is vital for control and security. Custom roles ensure team members access the right resources while preventing unauthorized entry. This article guides you through creating specific permission-based custom roles.
Step 1: Accessing the Roles & Permissions Page
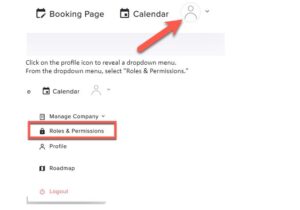
Begin by logging into your account and locating the profile icon in the top right corner of the screen.
Step 2: Creating a New Role
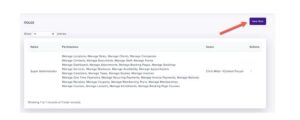
You will be directed to the Roles & Permissions page, which lists all existing roles within your organization.
To create a new role, locate the “New Role” button at the top right corner of the page and click on it.
Step 3: Configuring the New Role
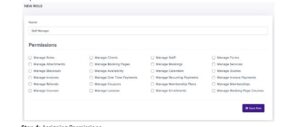
After clicking the “New Role” button, you will be taken to a page where you can configure the details of the new role.
In the “Name” field, enter a descriptive name for the role. This name should reflect the responsibilities and access level associated with this role.
Step 4: Assigning Permissions
You’ll see a list of permissions that can be assigned or deselected for this role. These permissions define what actions and resources the role will have access to.
Carefully select or deselect the specific permissions that should be associated with this role, customizing it to fit the requirements of your platform.
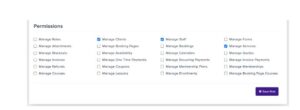
Once you have configured the permissions as needed, click the “Save Role” button at the bottom of the page to create the new role with custom permissions.

Managing roles and permissions is an ongoing process, so remember to review and update them regularly to align with evolving needs and responsibilities within your platform.